
1. 新建项目
使用纯代码布局,新建EventDemo项目时,取消勾选 “Generate form” ,如下: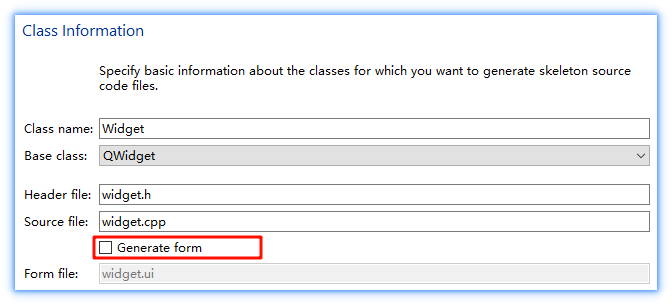
项目创建完毕的目录结构,如下:
2. 整体布局
- 左侧导航,采用垂直布局,会添加多个
QPushButton; - 右侧主体,使用
QStackedWidget,可以同时填充多个子页面,方便在多个子页面之间切换。
首先,来到widget.h中,声明相应的成员变量、槽函数等,并做空实现,如下:
#include <QButtonGroup>
#include <QStackedWidget>

class Widget : public QWidget {
private:
    void initNav();
    void initMain();

private slots:
    void buttonClicked(int index);

private:
    QWidget* navWidget;
    QStackedWidget* stackedWidget;
    QButtonGroup* btnGroup;
};然后,来到widget.cpp的构造中,添加左侧导航、右侧主体的整体框架,如下:
#include <QHBoxLayout>
#include <QVBoxLayout>

Widget::Widget(QWidget* parent) : QWidget(parent)
{
    this->setWindowTitle("明王讲QT | 第五章 事件、无边框窗口 | 常用事件");
    this->resize(800, 600);

    // 1. 整体采用水平布局
    QHBoxLayout* horizontalLayout = new QHBoxLayout(this);
    horizontalLayout->setSpacing(0);
    horizontalLayout->setContentsMargins(0, 0, 0, 0);

    // 2. 导航窗体
    navWidget = new QWidget(this);
    QVBoxLayout* leftLayout = new QVBoxLayout(navWidget);
    leftLayout->setSpacing(0);
    leftLayout->setContentsMargins(0, 0, 0, 0);

    horizontalLayout->addWidget(navWidget);

    // 3. 主窗体
    stackedWidget = new QStackedWidget(this);
    horizontalLayout->addWidget(stackedWidget);
    stackedWidget->setStyleSheet("QStackedWidget{background-color:rgb(255,255,255);}");

    initNav();
    initMain();
}
3. 实现左侧导航
来到widget.cpp中,实现initNav()函数,如下:
void Widget::initNav()
{
    QStringList names;
    names << "鼠标进入/离开"
          << "鼠标按下/移动/释放"
          << "键盘事件"
          << "定时器事件"
          << "拖动事件"
          << "绘图事件"
          << "右键菜单"
          << "总结:事件的传递流程";

    btnGroup = new QButtonGroup(this);

    for (int i = 0; i < names.count(); i++) {
        //
        QPushButton* btn = new QPushButton();

        // 设置按钮的文字
        btn->setText(QString("%1. %2").arg(i + 1, 2, 10, QChar('0')).arg(names.at(i)));

        // 设置按钮可选中-类似复选框的功能
        btn->setCheckable(true);

        // 设置样式表 - 按钮的字体大小
        navWidget->setStyleSheet(R"(
            QPushButton {
                font: 20px;
                text-align: left;
                padding: 15px;
            })");

        // 将按钮添加到 btnGroup 中,便于统一管理并实现互斥
        btnGroup->addButton(btn, i);

        navWidget->layout()->addWidget(btn);
    }

    navWidget->layout()->addItem(new QSpacerItem(1, 1, QSizePolicy::Fixed, QSizePolicy::Expanding));

    // 关联信号槽
    connect(btnGroup, &QButtonGroup::idClicked, this, &Widget::buttonClicked);
    btnGroup->button(0)->click();
}
此时,运行效果:
4. 实现右侧主体
右侧主体的QStackedWidget,可以填充多个子页面,并在多个子页面之间切换。
因此,要创建8个子窗口。
首先,在左侧项目文件名上右键,然后选择 “Add New…”,选择 “C++ Class”,如下:
此时,项目目录如下: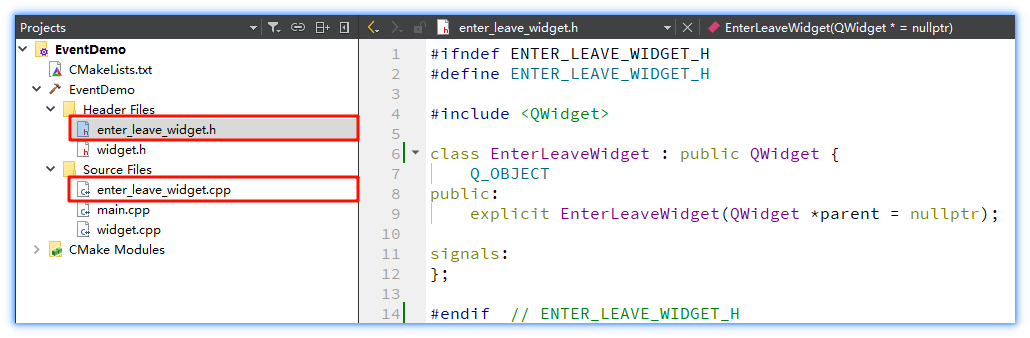
然后,为了便于区分,来到enter_leave_widget.cpp中,为页面添加一个标签,如下:
#include <QLabel>
#include <QVBoxLayout>

EnterLeaveWidget::EnterLeaveWidget(QWidget* parent) : QWidget{parent}
{
    QVBoxLayout* verticalLayout = new QVBoxLayout(this);
    verticalLayout->setSpacing(0);
    verticalLayout->setContentsMargins(0, 0, 0, 0);

    QLabel* lbl = new QLabel("鼠标进入/离开");
    lbl->setFrameShape(QFrame::Box);
    lbl->setFixedHeight(50);
    lbl->setAlignment(Qt::AlignCenter);
    lbl->setStyleSheet("background-color: blue; color: white; font-size: 25px");
    verticalLayout->addWidget(lbl);
}最后,根据上述方法,创建剩余的7个子窗口,最终效果如下: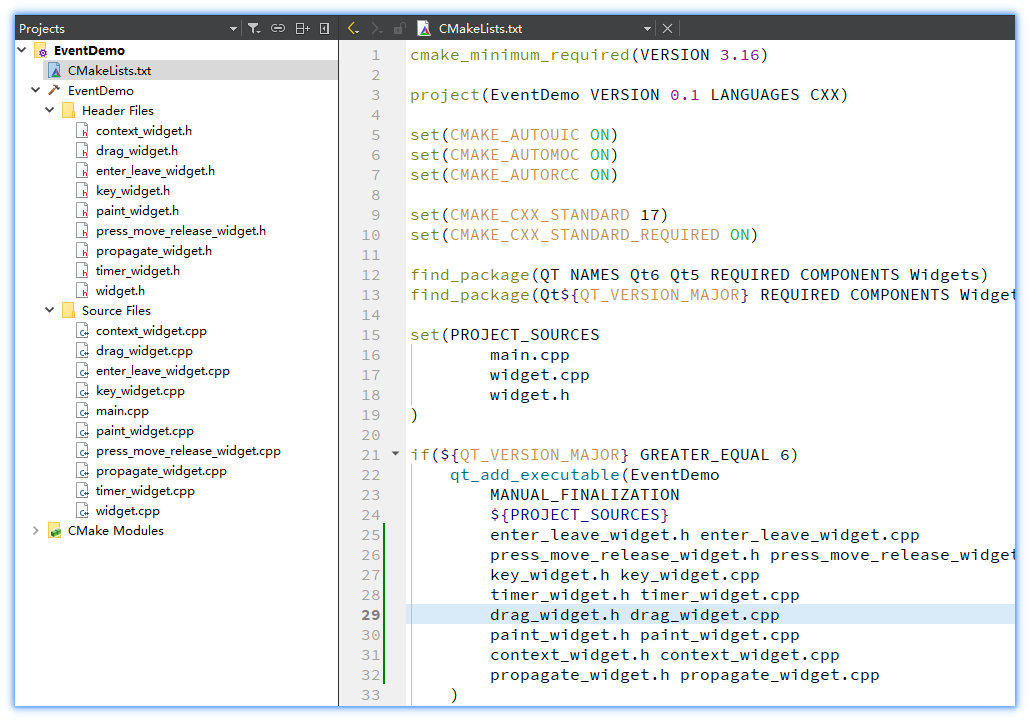
5. 左右联动
实现点击左侧导航栏的按钮,切换右侧的子界面
首先,来到widget.cpp中,实现 initMain() 函数,如下:
#include "enter_leave_widget.h"
#include "press_move_release_widget.h"
#include "key_widget.h"
#include "timer_widget.h"
#include "drag_widget.h"
#include "paint_widget.h"
#include "context_widget.h"
#include "propagate_widget.h"

void MainWidget::initMain()
{
    // 逐个添加子窗体
    stackedWidget->addWidget(new EnterLeaveWidget());
    stackedWidget->addWidget(new PressMoveReleaseWidget());
    stackedWidget->addWidget(new KeyWidget());
    stackedWidget->addWidget(new TimerWidget());
    stackedWidget->addWidget(new DragWidget());
    stackedWidget->addWidget(new PaintWidget());
    stackedWidget->addWidget(new ContextWidget());
    stackedWidget->addWidget(new PropagateWidget());
}然后,实现buttonClicked()槽函数,如下:
void MainWidget::buttonClicked()
{
    // 识别按下了哪个按钮
    int index = btnGroup->checkedId();
    stackedWidget->setCurrentIndex(index);
}